So, you’ve got a Nintendo Switch—the hybrid gaming beast that’s been dominating living rooms and backpacks since 2017. Whether you’re slaying Bokoblins in Zelda or scoring goals in Mario Strikers, sometimes handheld mode just doesn’t cut it.
You crave that cinematic, big-screen experience. But how do you actually connect your Switch to a TV? Let’s break it down step-by-step, covering both the official dock method and a handy workaround for dock-less setups.
Grab your Joy-Cons, and let’s dive in!
Why Docked Mode Rocks
Before we get technical, let’s appreciate why docked mode is worth the effort. The Switch boosts its performance when docked, rendering games at up to 1080p (versus 720p in handheld).
Plus, multiplayer games like Super Smash Bros. or Mario Kart just hit different on a 50-inch screen.
And let’s be real—your wrists will thank you after ditching handheld mode for a Pro Controller.
Method 1: Using the Official Nintendo Switch Dock
Perfect for seamless, risk-free TV play.
What You’ll Need
- Nintendo Switch console
- Switch Dock (the rectangular slab that came with your console)
- HDMI cable (not included in the box—grab one from your TV stash)
- Nintendo Switch AC Adapter (model HAC-002—don’t use a random phone charger!)
- A TV or monitor with an HDMI port
Step-by-Step Setup
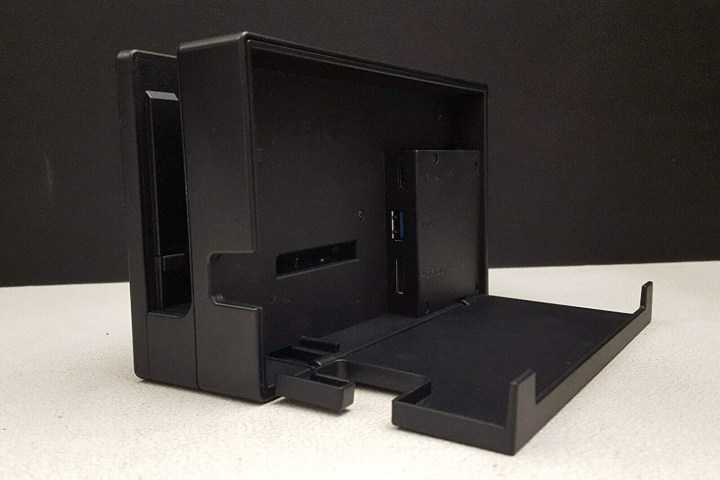
1. Dock Prep 101
Flip the dock around to its backside. You’ll see three ports:
- AC Adapter Port (top): For power.
- USB 3.0 Port (middle): Mostly for accessories like LAN adapters. Ignore this for now.
- HDMI Out (bottom): Your ticket to TV glory.
2. Plug in the HDMI Cable
- Take your HDMI cable and jam one end into the dock’s HDMI Out port.
- Connect the other end to any open HDMI port on your TV. Note which HDMI number it’s using (e.g., HDMI 1, HDMI 2)—you’ll need this later.
3. Power Up the Dock
- Grab the official Nintendo AC adapter (seriously, third-party chargers can fry your dock). Plug the rectangular end into the dock’s AC Adapter Port.
- Connect the adapter’s pronged end to a wall outlet. No power? No docked mode.
4. Cable Management
Close the dock’s back cover gently, threading the HDMI and power cables through the notch. Avoid kinking the cables—they’re fragile!
5. Dock Your Switch
Here’s where magic happens:
- Slide the Switch console into the dock, screen facing the same direction as the dock’s front panel (the side with the Nintendo logo).
- You’ll feel a slight click. The screen will go dark—this is normal! The console is now outputting to your TV.
6. Wake the Beast
- Turn on your TV and grab the remote.
- Navigate to the correct HDMI input (the one you plugged into earlier).
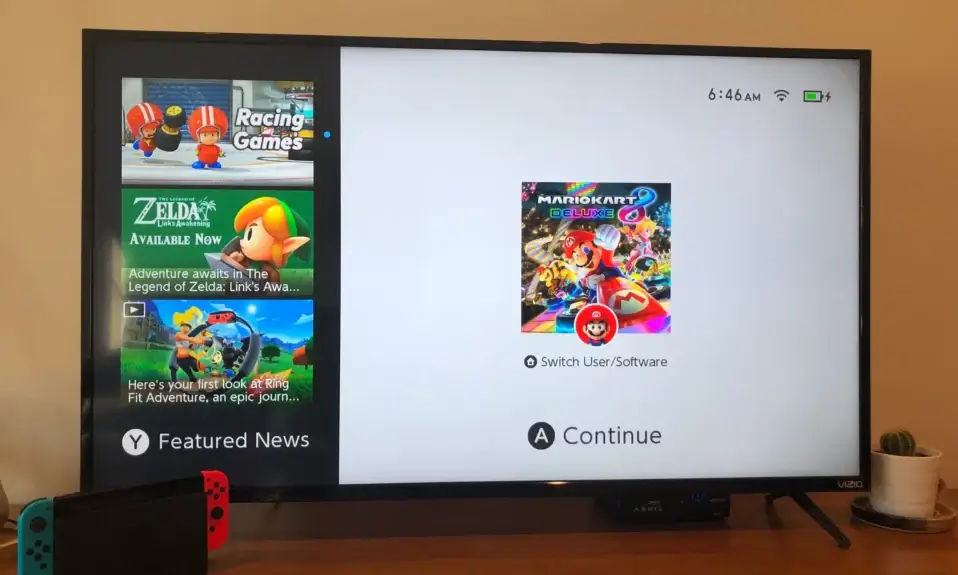
- Press the Home button on a Joy-Con or Pro Controller. Voilà! Your Switch home screen should appear.
Troubleshooting Tips
- No Signal? Double-check the HDMI input. Cycle through your TV’s inputs if needed.
- Dock Not Charging? Ensure the AC adapter is fully plugged into both the dock and the outlet.
- Screen Flickering? Try a different HDMI cable or port.
Method 2: Connecting Without the Dock
For rebels who lost their dock or want a portable setup.
What You’ll Need
- A USB-C to HDMI adapter with Power Delivery (PD) support. Look for brands like Genki, JumpGate, or the official Switch dock internals (if you’re DIY-savvy). Avoid cheap knockoffs—they can overheat your Switch!
- Nintendo Switch AC Adapter (again, HAC-002)
- HDMI cable

Step-by-Step Setup
1. Assemble Your Frankenstein Dock
- Unplug the AC adapter and HDMI cable from your original dock (if available).
- Plug both cables into your USB-C adapter’s ports. Most adapters have:
- USB-C PD Input: For the AC adapter.
- HDMI Out: For the HDMI cable.
- Extra USB ports (for LAN adapters or controllers).
2. Connect to Your Switch
- Take the USB-C end of your adapter and plug it into the USB-C port on the bottom of your Switch.
- Important: The Switch’s USB-C port is delicate. Insert the plug straight in—no angling!
3. Power and HDMI
- Plug the AC adapter into a wall outlet. Without power, your Switch will run on battery and might not output to TV.
- Connect the HDMI cable to your TV and switch to that input.
4. Wake and Play
- Turn on the Switch. The screen will stay dark, but your TV should display the home menu. If not, check all connections and ensure the adapter supports 1080p HDMI output.
Critical Notes for Dock-Less Setups
- Risk of Bricking: Early third-party docks fried Switches. Modern passive adapters (no internal software) are safer. Still, stick to reputable brands.
- Charging Speed: Use the official AC adapter. Phone chargers often lack enough wattage (needs 39W PD).
- Heat Warning: The Switch gets toasty in TV mode. Place it on a cool, flat surface—not a couch or blanket.
Pro Tips for Hassle-Free Gaming
- Joy-Con Management: Always attach Joy-Cons to the console before docking. If they’re wireless, sync them via the “Controllers” menu.
- Charge Smart: After undocking, reattach Joy-Cons to the console or dock to keep them charged.
- Avoid Scratches: Slide the Switch into the dock gently. A microfiber cloth on the dock’s interior can prevent screen scrapes.
- Overheating Fix: If your Switch feels like a toaster, undock it and let it cool. Ensure the room is well-ventilated.
Frequently Asked Questions (FAQs)
Can I use a laptop HDMI port?
Nope! HDMI ports on laptops are outputs, not inputs. You need a TV or monitor.
Why is the resolution blurry?
Check your TV’s display settings. Some TVs default to 720p—force 1080p in the Switch’s System Settings > TV Output.
Can I play while charging in handheld mode?
Absolutely! Use the AC adapter directly with the Switch’s USB-C port.
Whether you’re a dock purist or a USB-C adapter maverick, transforming your Switch into a home console is simpler than beating a Goomba. Just remember: stick to official gear where possible, baby that USB-C port, and keep things cool. Now, go flex those gaming skills on the big screen—your kingdom (and your TV) awaits!
Got questions or a wild docking hack? Drop a comment below! 🎮✨